Cisco CUCM – Multiple Extensions
Follow the instructions in this topic to set up Q-SYS Softphone for Cisco Unified Communication Manager (CUCM) in a multiple extension configuration.
When you add users and extensions to the Cisco Unified Communications Management (CUCM) system, make sure you have adequate licensing to proceed. The Q-SYS Core is a third-party SIP endpoint in the CUCM system, and therefore each extension may require available licenses. Purchase any needed licenses from Cisco.
The number of Softphones you can have in a design is determined by the Q-SYS Core processor model.
Maximum Softphones per Design
Note: Q-SYS Scaling Licenses expand the capabilities of the Core 8 Flex and Core Nano processors. Refer to the Licensing topic for more information.
| Core Model | Max Softphones |
|---|---|
|
NV-32-H (Core Mode) |
1 |
|
Core Nano |
2 |
|
Core 8 Flex |
2 |
|
Core 110f |
4 |
|
Core 110c |
1 |
|
Core 510i |
64 |
|
Core 510c |
4 |
|
Core 5200 |
64 |
| Discontinued | |
|
Core 250i |
64 |
|
Core 500i |
64 |
|
Core 1100 |
64 |
|
Core 3100 |
64 |
Refer to these procedures in the Cisco CUCM – Single Extension topic if you have not previously configured CUCM:
Refer to the Add and Configure a Softphone in CUCM procedure in the Cisco CUCM – Single Extension topic for guidance. However, for a multi-phone setup, note that:
-
You will only configure a single device for all Directory Numbers (DNs).
-
The phone type to use is "Third Party SIP Device (Advanced)" instead of "Third Party SIP Device (Basic)".
An example with four phones is shown below:
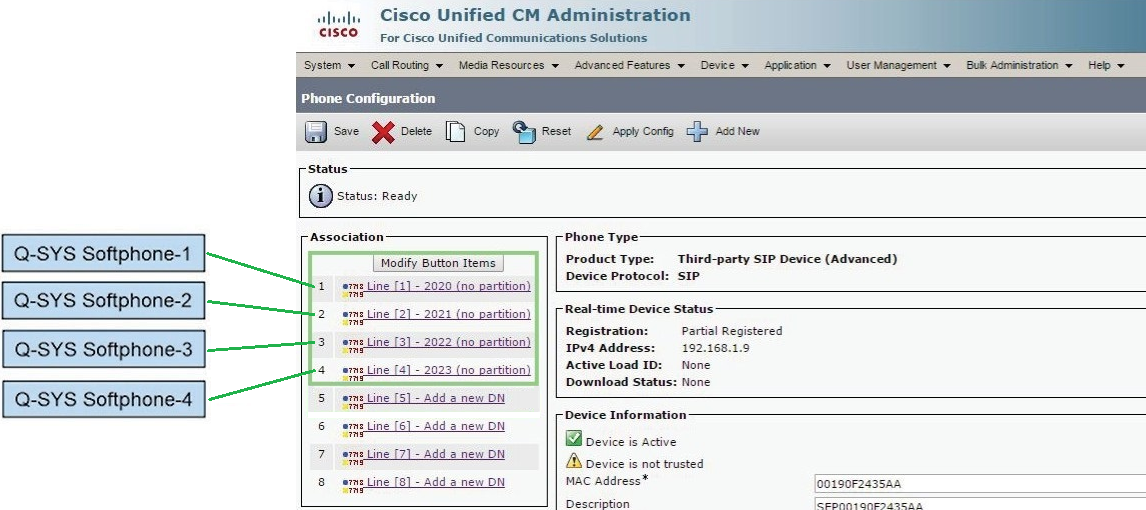
For each line, add a Directory Number (DN). Refer to the Add a Directory Number procedure in the Cisco CUCM – Single Extension topic for guidance and repeat for each line/softphone.
The Q-SYS Softphones are each associated with lines in CUCM. Use Q-SYS Core Manager to configure each softphone.
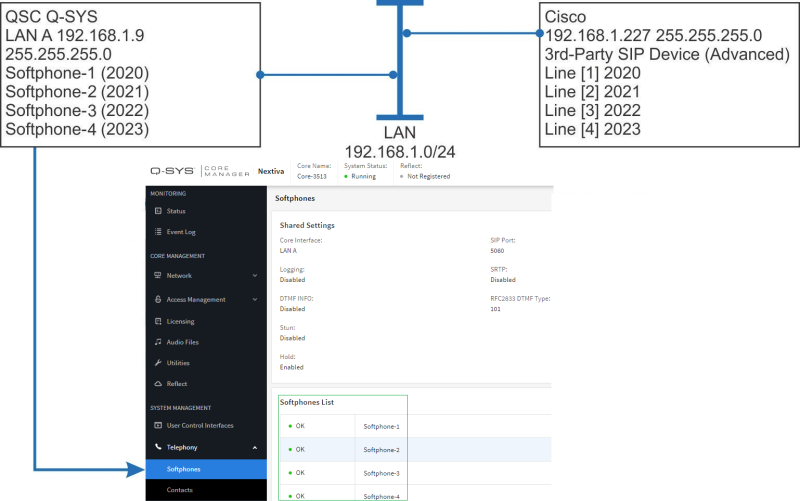
- Open Q-SYS Designer Software. Go to File > Load from Core & Connect and then select the Core processor.
- Go to Tools > Show Core Manager. Select Softphones. Click Softphone-1, and then click Edit.
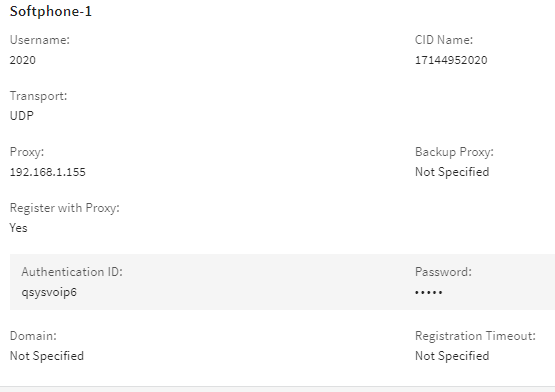
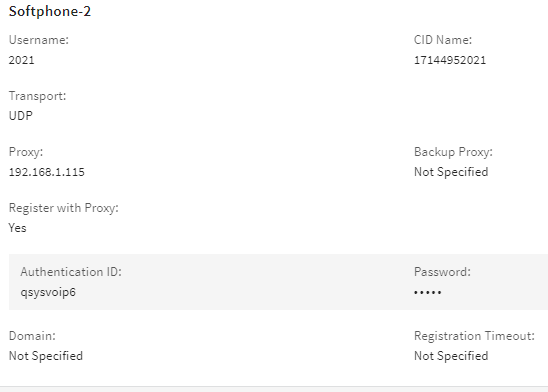
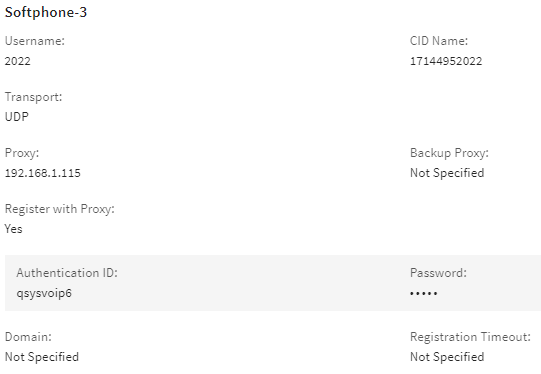
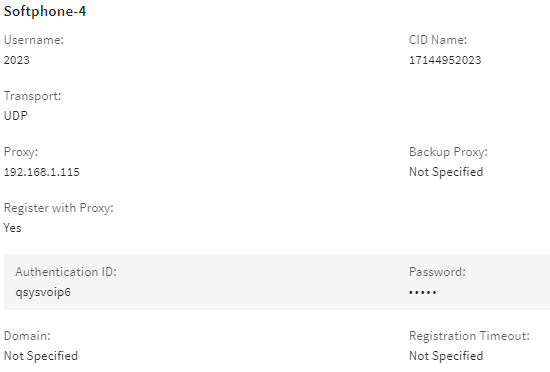
- Configure the parameters for the softphone. Of note:
- Core Interface - Select the LAN interface to use for VoIP traffic. This interface must be able to reach CUCM.
- Audio Codecs - Select only G.722 and either G.711 ulaw or G.711 alaw (largely depending on the system’s location). In North America, G.711 ulaw is prevalent; outside North America, G.711 alaw is more common. Contact your phone system admin if you are not sure.
- Username - This usually matches the Directory Number in CUCM.
- Transport - Use the setting that matches the Transport Type in the Phone Security Profile in CUCM.
- Proxy - This is the IP address of the CUCM server. If you are using a cluster of CUCM servers with a publisher and multiple subscribers, the proxy IP should be one of the servers that allows registration.
- Authentication ID - This is the same as the User ID on the End User screen in CUCM.
- Password - This is the same as the Digest Credentials.
- Repeat for each Softphone in the design.
Examples
In these examples, Q-SYS Softphone-1, 2, 3, and 4 correspond to CUCM Line 1, 2, 3, and 4.
-
To view the registered device list in CUCM, go to Device > Phone. The phones will be listed by device name.
-
After a Q-SYS Softphone is configured, the Cisco Third-party SIP Device (Advanced) may appear in CUCM with a status of "Partial Registered" as shown below. This is because some, not all, of the lines configured in CUCM for the device have successfully registered. This is not an issue.
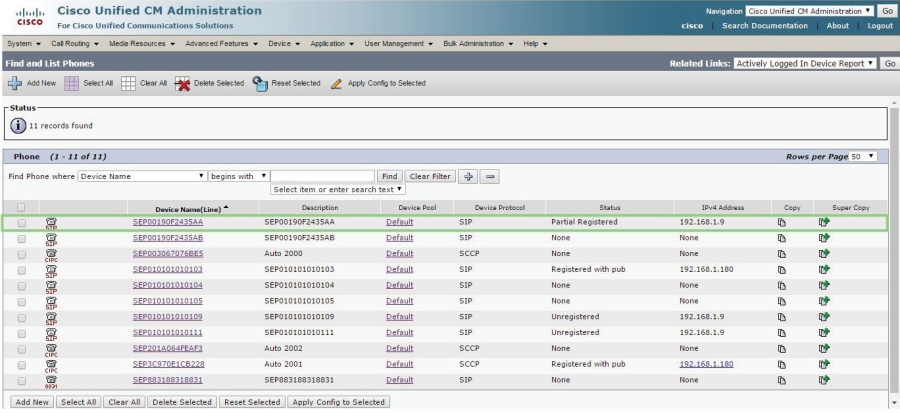
-
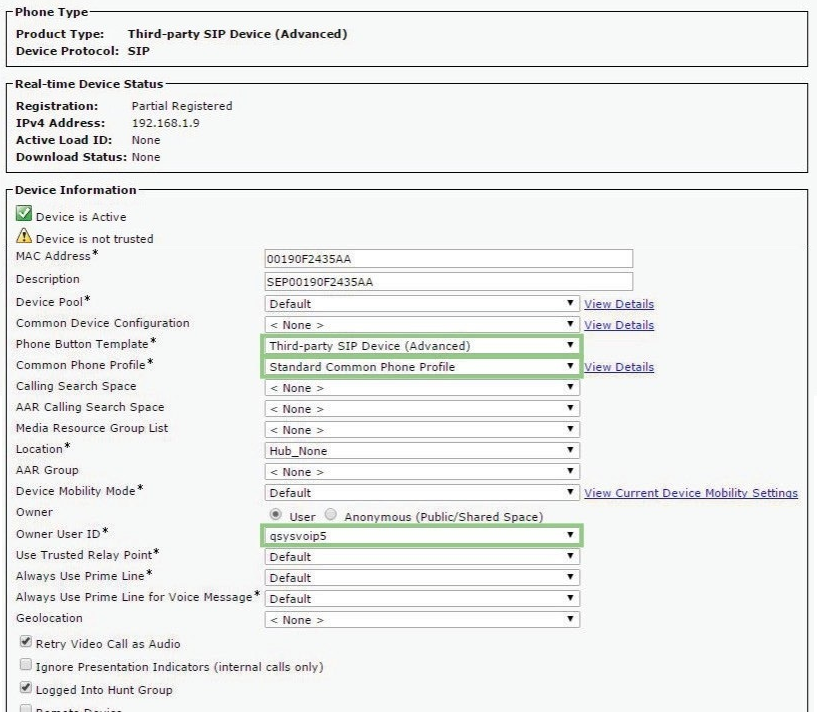
Click on the Q-SYS Softphone’s Device Name. Its Phone Configuration page appears.
-
In the Device Information section, configure the Phone Button Template, Common Phone Profile, and Owner User ID. Repeat for each Device (Q-SYS Softphone).
-
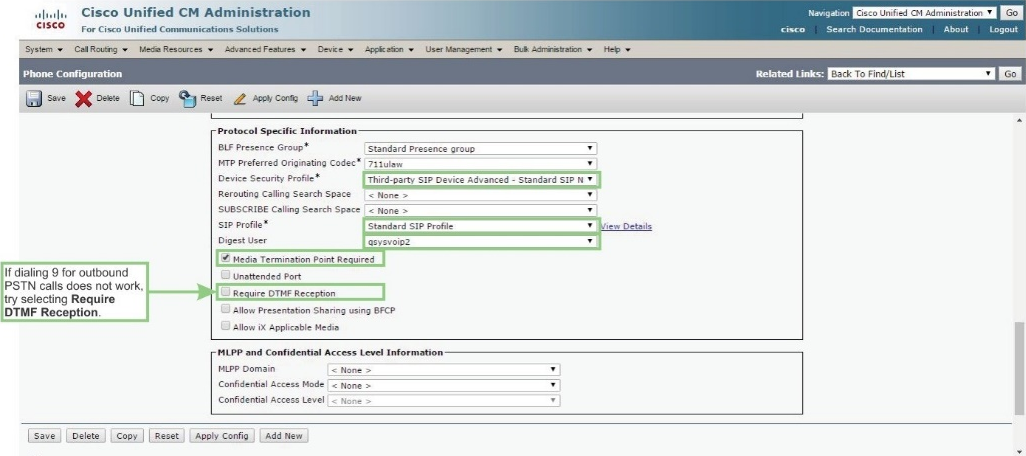
In the Protocol Specific Information section:
-
Configure the Device Security Profile, SIP Profile, and Digest User.
-
Select Media Termination Point Required.
-
If there are problems making outbound PSTN calls after dialing 9, try selecting Require DTMF Reception.
-
Click Save.
-
-
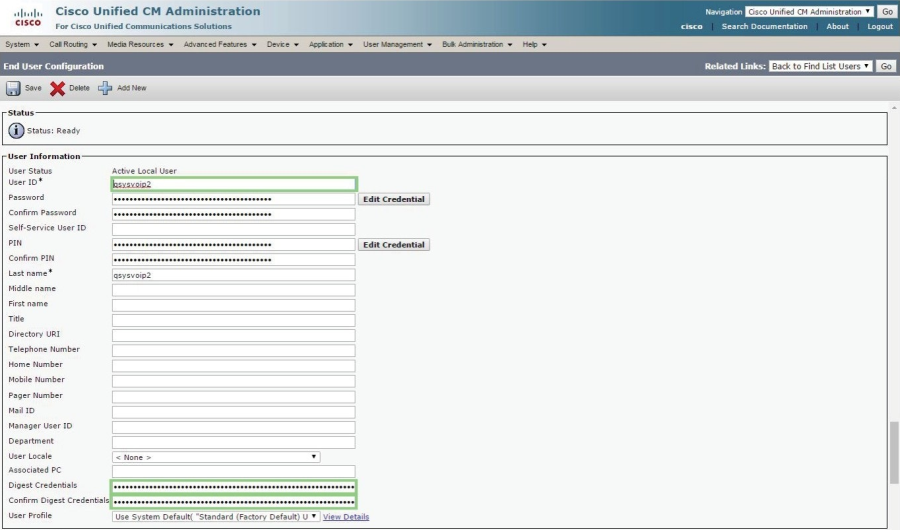
Go to End User Configuration to configure the User ID, and set up and confirm the Digest Credentials.
-
Scroll all the way down to the bottom of the End User Configuration page and click Save.
-
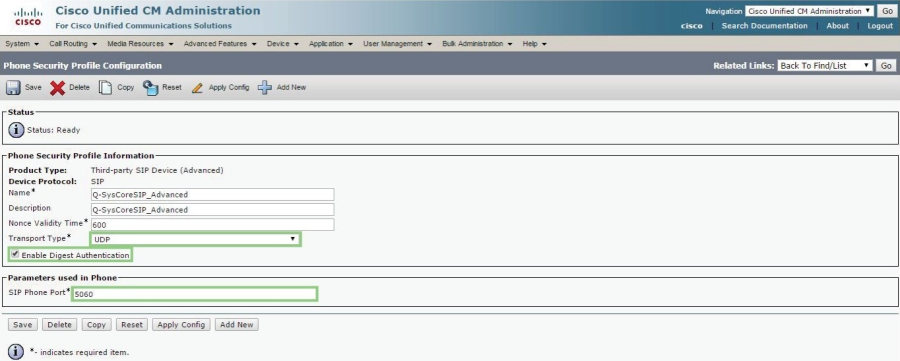
Go to Phone Security Profile Configuration.
-
Set up the Transport Type.
-
Select Enable Digest Authentication.
-
Designate the SIP Phone Port.
-
Click Save.
-
- Go to Q-SYS Designer Software and open Q-SYS Core Manager (Tools > Show Core Manager).
- Click Network Settings.

- If you are using only one LAN port, configure one gateway, as shown. Additional static routes are not needed.
- If you are using more one LAN port, configure only one gateway but add Static Routes for the second LAN port.
| SIP Response Code | Description |
|---|---|
|
401 |
SIP/2.0 401 Unauthorized Typically caused by incorrect credentials from the calling user agent (Q-SYS Softphone), and/or misconfigured CUCM end user settings, and/or 3rd party SIP Phone settings. |
|
404 |
SIP/2.0 404 Not Found Typically has the same causes as SIP code 401 (see above). |
|
503 |
Registration Failed with status Service Unavailable [503] Typically caused by CUCM CallManager service not being enabled. Seen in clustered CUCM environments where only certain CUCM servers run the CallManager service. Remedy: Make sure the Q-SYS Softphone is configured with the correct CUCM server (i.e., one running CallManager service). Other common causes: Having the wrong IP address configured in Q-SYS softphone for the CUCM server. Network issues preventing communication with CUCM. |
Note: The content in this topic is current through CUCM version 12.5.1.
