Scriptable controls are a combination of the commonly used Control Script block and Custom Controls. You can add any number of controls, give them custom names and choose whether to expose those control's pins as inputs, outputs, inputs AND outputs or none. There is also a built-in Lua scripting area (Script v2 only) that can directly access the custom controls. This combination component can save greatly simplify scripts, by only requiring a subset of external control wiring. Controls that are only used to set modes, define IP addresses or baud rates, etc. do not necessarily need to have pins exposed as was always necessary with discrete Script blocks wired to one or more Custom Controls component. Scriptable Controls do not replace the discreet Control Script or Custom Controls components, but provide a potentially simpler interface for housing Lua-scripted solutions.
Scripts written in the Scriptable Controls component can fully utilize every Lua Script v2 feature, including all of the Q-SYS specific libraries, so it is possible to use this component to accomplish any need for scripting in Q-SYS. You could write scripts to control elements entirely within the Q-SYS Designer file or you could use it to interface Q-SYS with third-party hardware accessible via Serial, TCP, UDP or HTTP.
NOTE: This component uses the Q-SYS Scripting Engine, which is a licensed feature on certain Cores manufactured with Q-SYS 7.0 and later. For more information, see Feature Licensing.
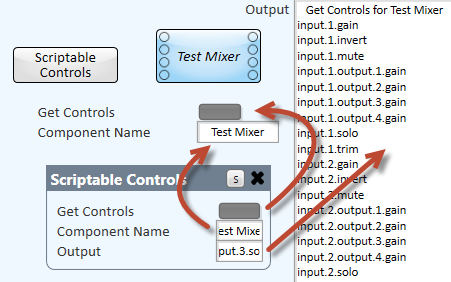
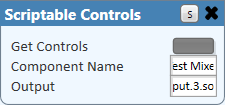
This image shows a Scriptable Controls component with script to retrieve control names from another component. This uses the Script v2 Component library to retrieve the full list of control names that can be used, in turn, to control specific controls within any named component within the design without any wiring. The controls you see in the capture above were copied out of the component (shown by the red arrows). This script is created in the following way:


|
||||||||||||||||||||
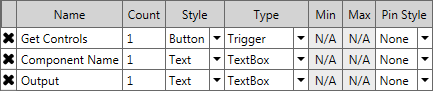
NOTE: You can click the black X to the left of any row to completely remove that row. Any new rows are always added to the bottom.
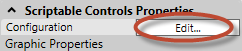
 button in the upper right corner of the dialog to open the script window.
|
Controls["Component Name"].EventHandler = function(ctl) comp = Component.New(ctl.String) end
-- Returns all controls of the component in "Component Name" Controls["Get Controls"].EventHandler = function() local str = " Get Controls for "..Controls["Component Name"].String.."\r" for k,v in pairs(comp) do str = str..k.."\r" end Controls.Output.String = str end
comp = Component.New(Controls["Component Name"].String) |
QSC.com | Software and Firmware | Resources | QSC Self Help Portal
© 2009 - 2018 QSC, LLC. All rights reserved. QSC and the QSC logo are trademarks of QSC, LLC in the U.S. Patent and Trademark office and other countries. All other trademarks are the property of their respective owners.
http://patents.qsc.com
